Introduction
Did you know that 80% of Illustrator users rely on the pen tool for the majority of their work? It’s a game-changer! But for beginners, it might be intermediating because of its complexity and control. but not anymore. I will guide you to make it simple for you and make you the master of the pen tool.
I will teach its functions, shortcuts, and best workflows to get a better understanding of the pen tool.
Understanding the Pen Tool
What Is the Pen Tool?
The Pen Tool is a fundamental tool in graphic design, allowing for precise and intricate shape creation. It offers a high level of control over the path of a line or shape, making it ideal for various applications
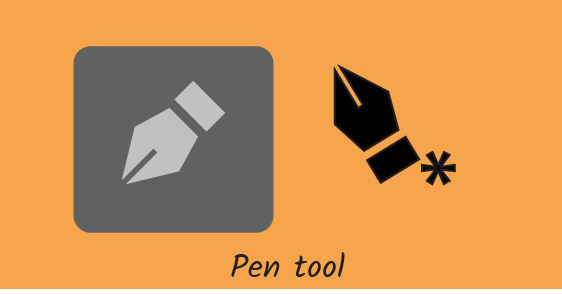
- The shortcut key for the pen tool is “P”
- It Used Logo design, tracing images, creating custom shapes, etc.
- Drawing unique shapes and illustrations that can’t be achieved with basic tools.

Basics of the Pen Tool
Anchor Points
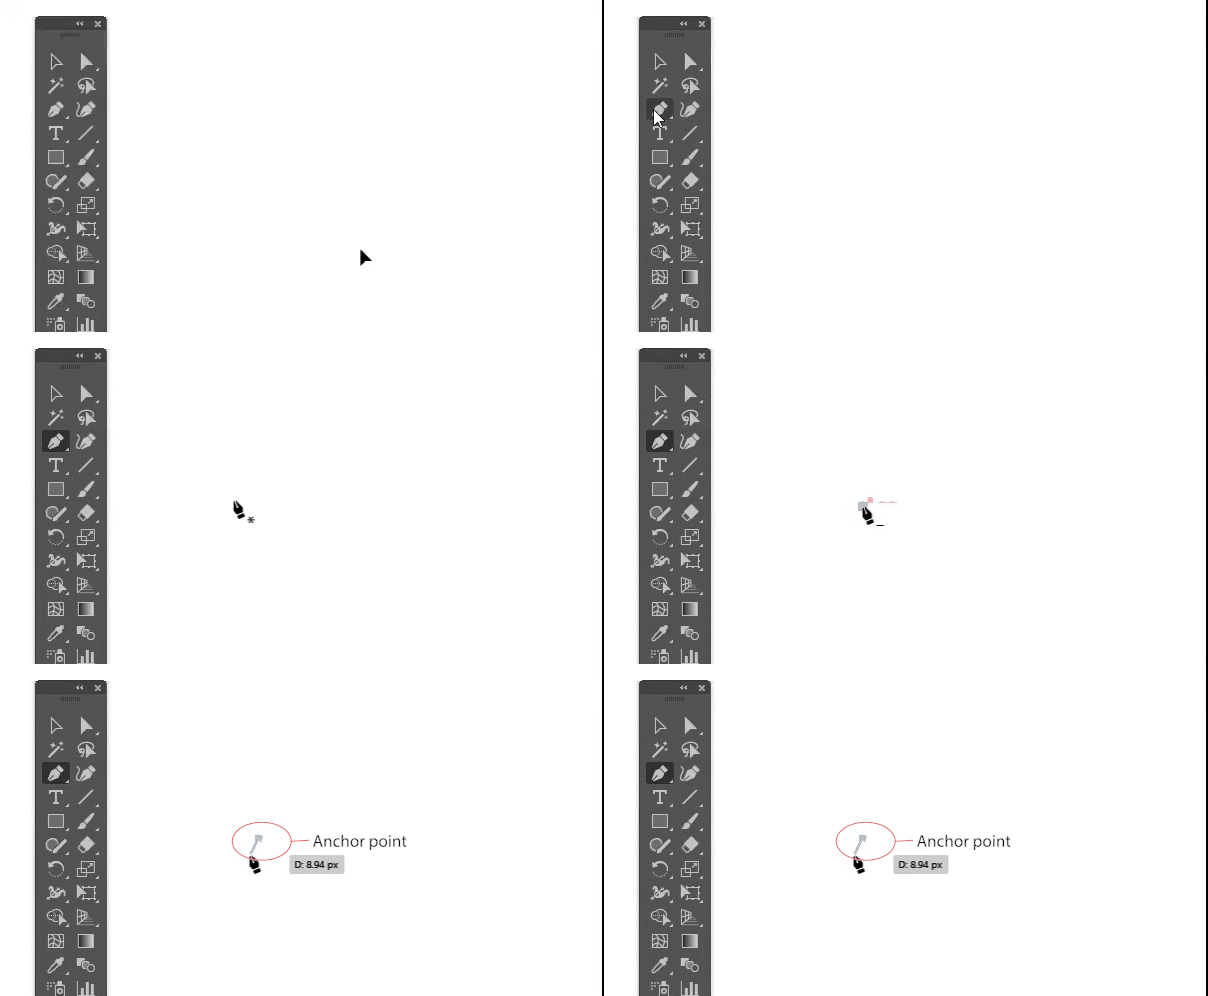
anchor points are the points from which vector shapes are made, they are the building blocks of any vector shape.
- you can create an anchor point by just clicking on the artboard with the pen tool.
Working with Paths and Curves
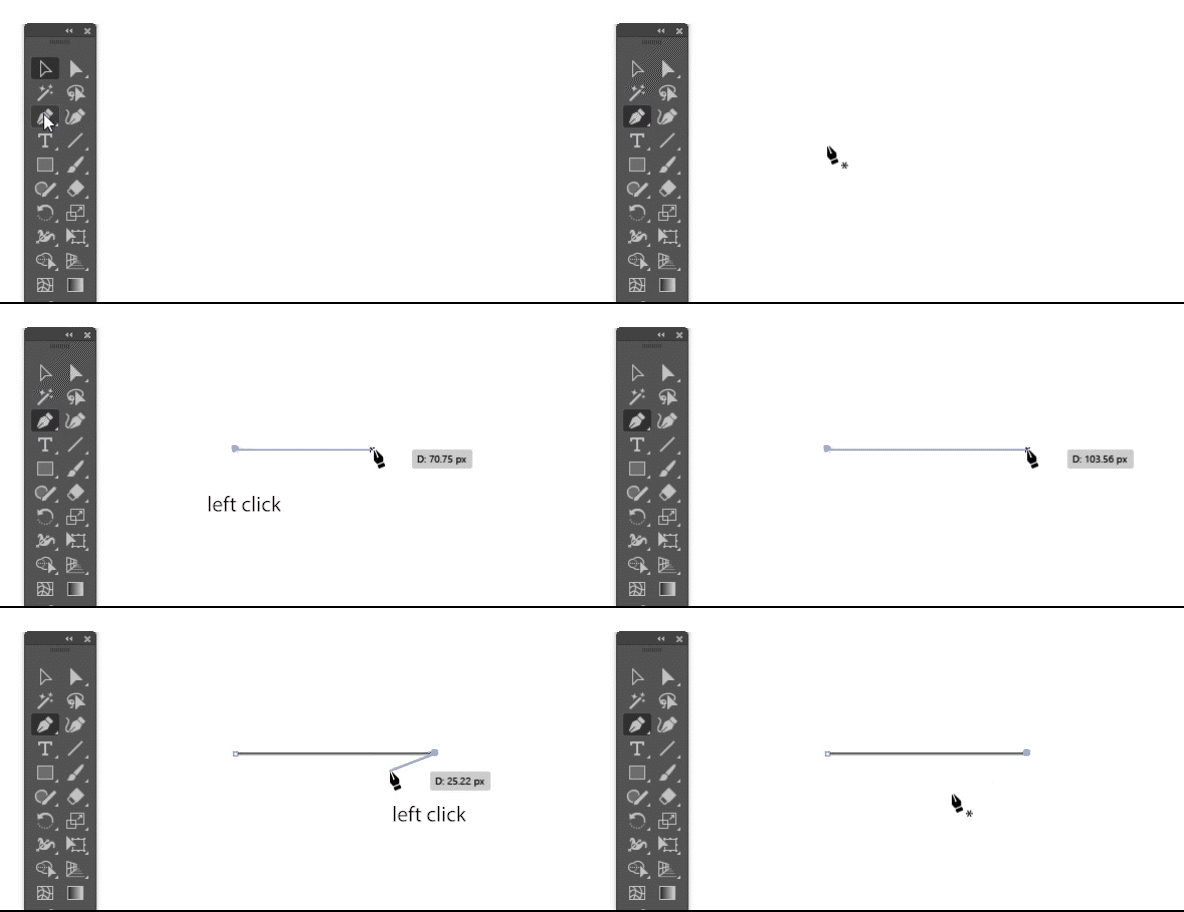
- Straight path: just click left click on a point and the the next point
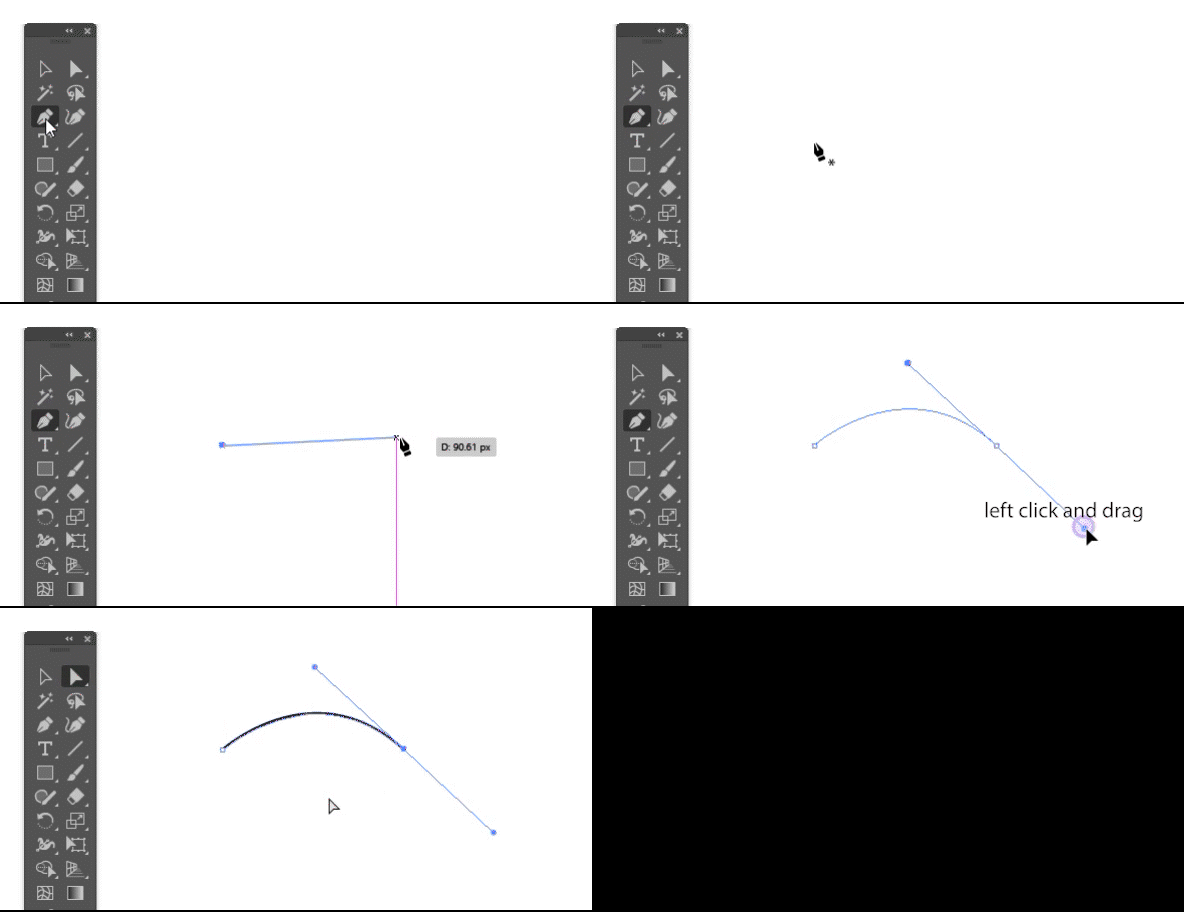
- curves: To create a curve just hold left click and drag at required angle to adjust the direction of handles.(anchor point of curves come with handles)
- To close the shape made with the pen tool click the very first anchor point used to make the shape.
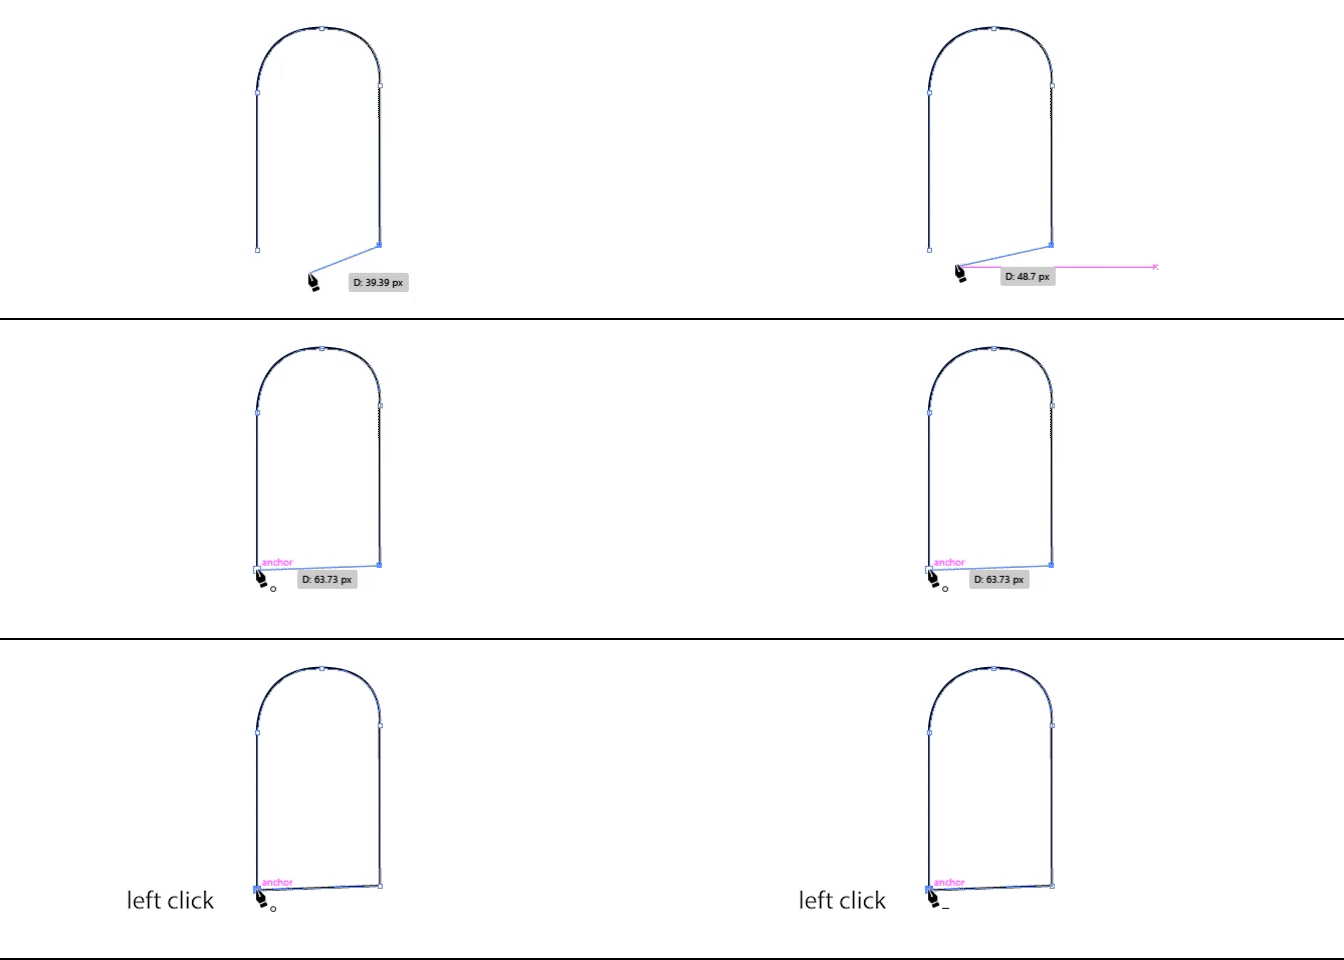
- if you want open path just click the Enter or Esc key on the keyboard after you complete the path
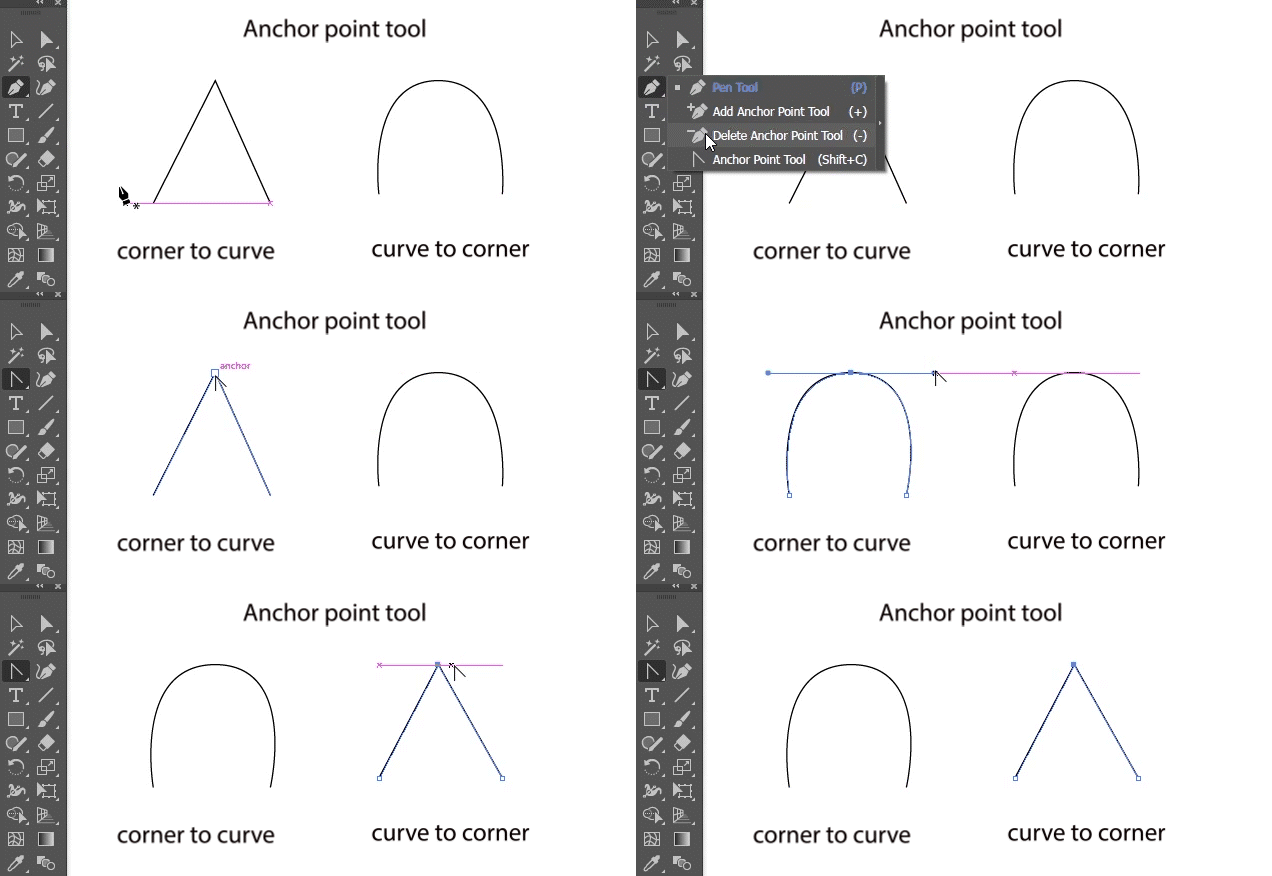
- The pen tool family: these tools are constantly used with the pen tool.

- Add anchor point use to add more anchor points on an existing path or shape.
- Delete Anchor point is used to delete anchor points from existing paths or shapes.
- Anchor point tool use to manipulate the anchor point’s property and use it to adjust handles.
Mastering Key Techniques
Creating Complex Shapes
- straight path after straight path If you want to create a straight path after the straight path just left-click with the pen tool to create straight paths between two anchor point.
- curves after the straight path: If you want to create a Curve after the straight path just left-click and drag the handle to the required angle with the pen tool.
- straight line after curve: If you want to make a curve and a straight path after it you need to break the handle by just clicking on the the last anchor point.

- Curve after curve: if you want curve after a curve, you have to give the handle proper direction by holding Alt/option key, dragging, adjusting, and releasing it then you can add another anchor point to make another curve.

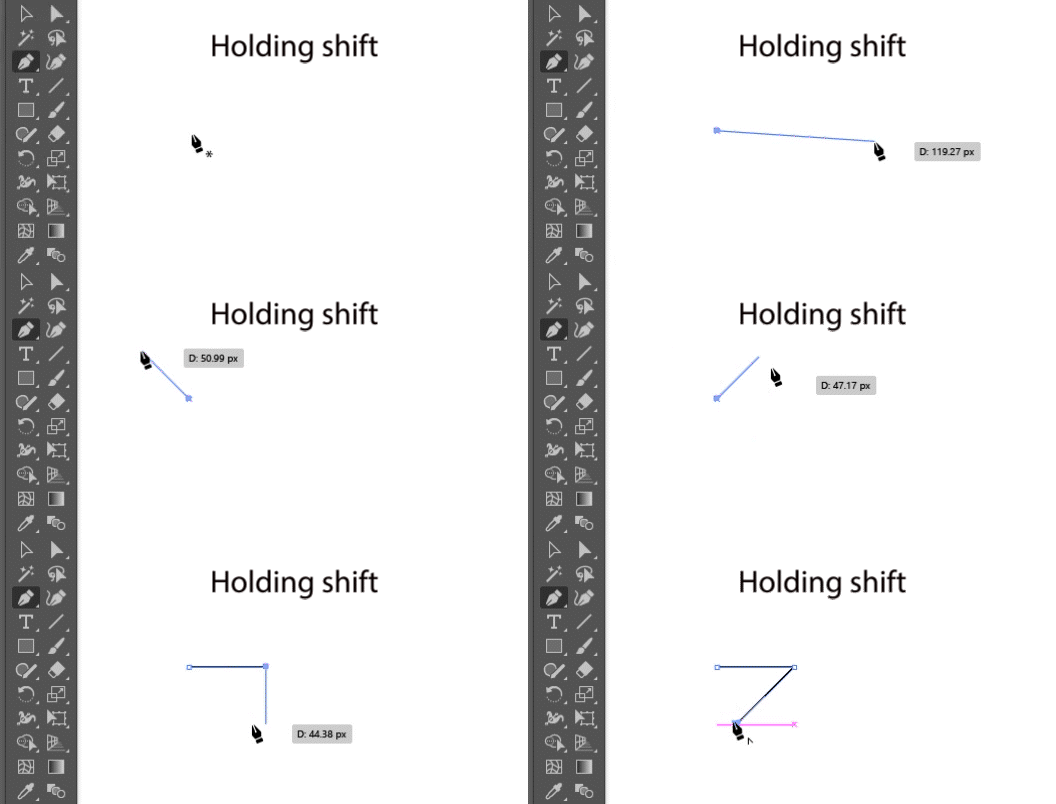
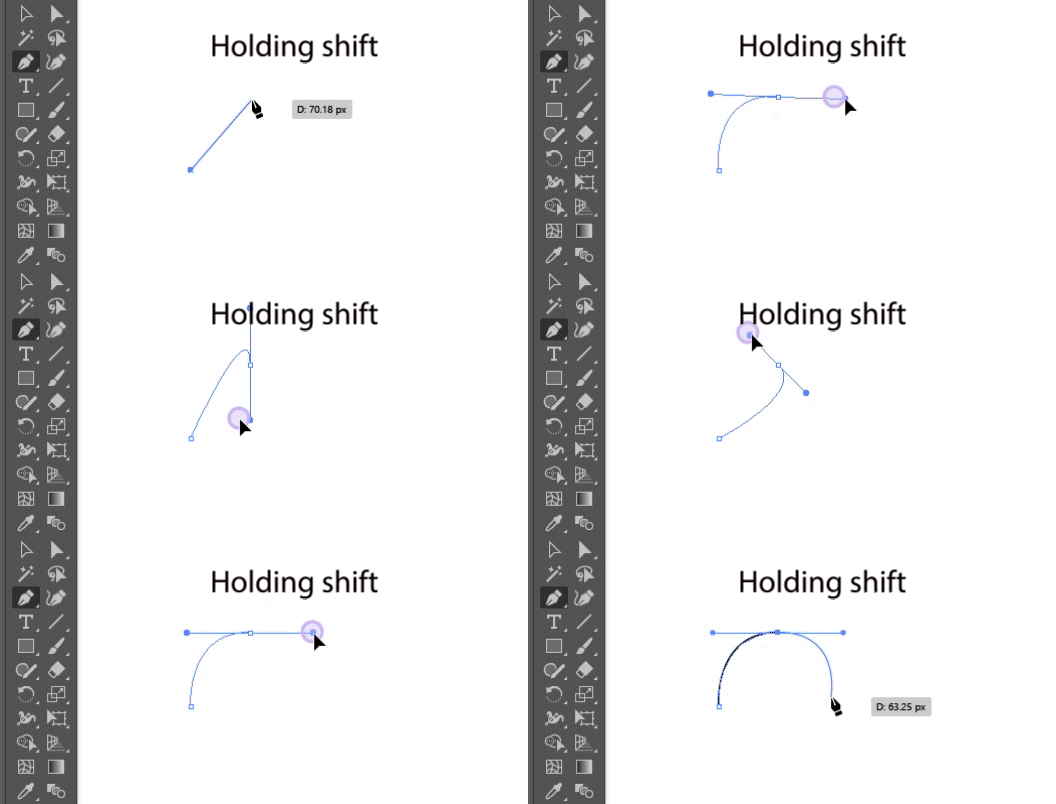
- Use of shift key: If you hold the shift key while make a straight path or curve you can snap the next anchor point or the handle on each 45°
Using the Handles Effectively”
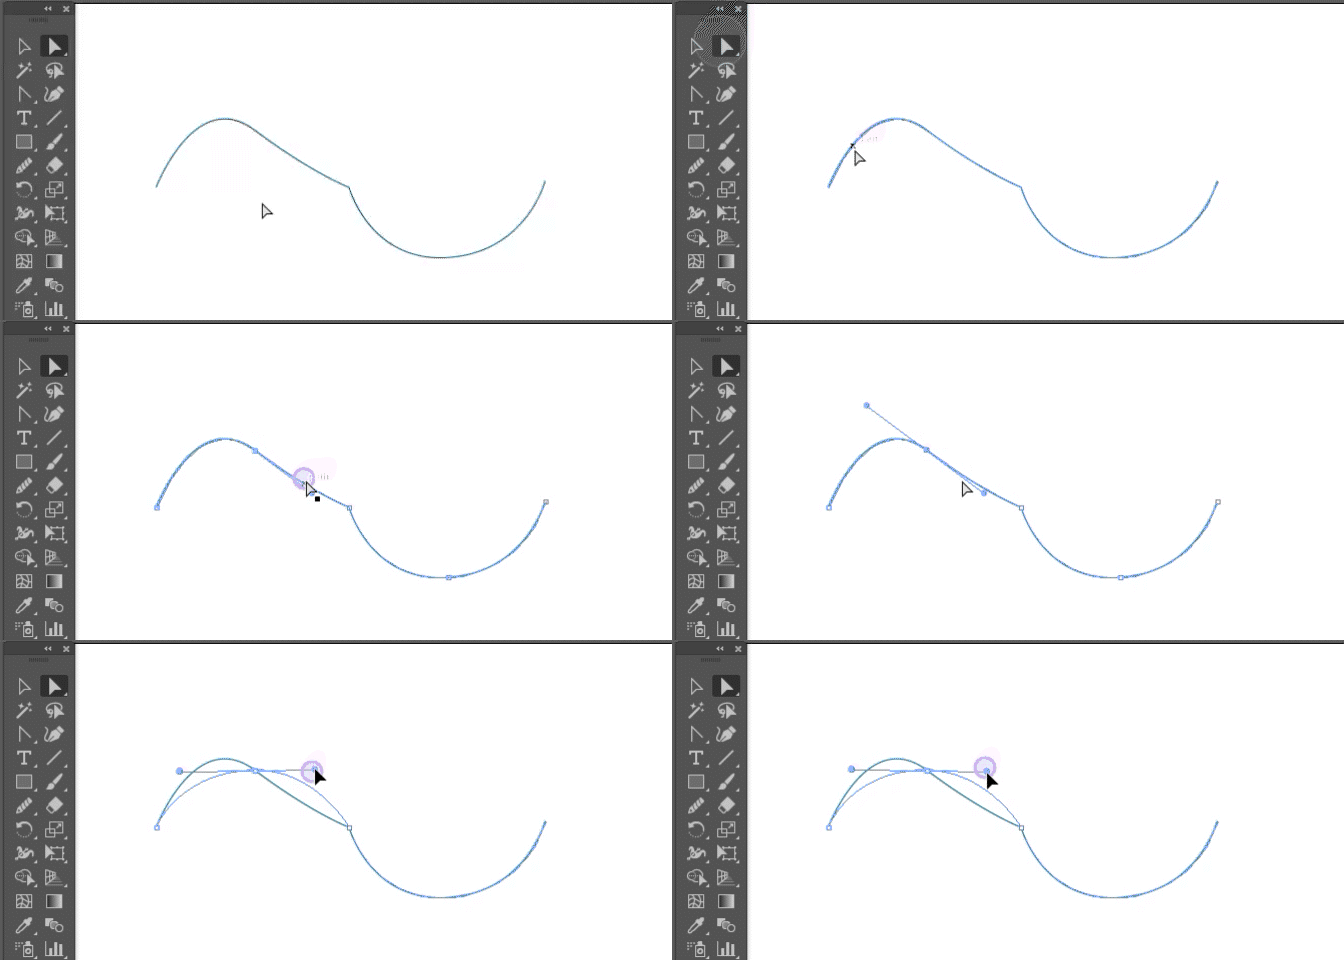
- Handles control the direction and length of your curves. By dragging them, you can fine-tune the shape of your path.
- Pro Tip: first block out your rough shape and then adjust its points and handles from the Direct selection and anchor point tool.
Common Mistakes and How to Avoid Them
- Too Many Anchor Points
- Solution: Use fewer points to create smoother, more fluid curves. Extra points can make paths look jagged or uneven. or smooth tool to reduce anchor points from the path and make it smoother.

- Uneven Curves”
- Solution: adjust your handles symmetrically to maintain smooth curves. If one side is off, your shape will look distorted.
Practical Exercises
- Exercise 1: “Trace a Simple Shape” Download here
- Exercise 2: “Create a Custom Logo Using the Pen Tool”
- then practice making more complex shapes.
Advanced Tips and Tricks
- Use shortcuts to speed up your workflow, such as holding ‘Shift’ to constrain angles or using ‘Ctrl/Cmd’ to adjust anchor points without switching tools.
- Combine the Pen Tool with other tools like the Shape Builder to refine your designs, merge shapes, or create intricate patterns.
- for a symmetrical shape make half of it and reflect a copy of it and join the common points.
- Practice practice practice…
Conclusion
- Mastering the Pen Tool opens up endless possibilities in your design work, from creating logos to crafting intricate illustrations. It’s all about practice and patience.
- Keep practicing, and don’t be discouraged by mistakes—every curve you create brings you closer to mastery.
- Do practice and if you have some questions ask in the comments.
Additional Resources
- Download some free practice files from here. trace them with a pen tool and practice
- Browser games to practice pen tool The Bazier game, Adobe pen tool
This layout combines step-by-step tutorials, practical exercises, and visuals to create an engaging and educational experience. Let me know if you’d like help with any other aspects


[…] checkout our other articles […]